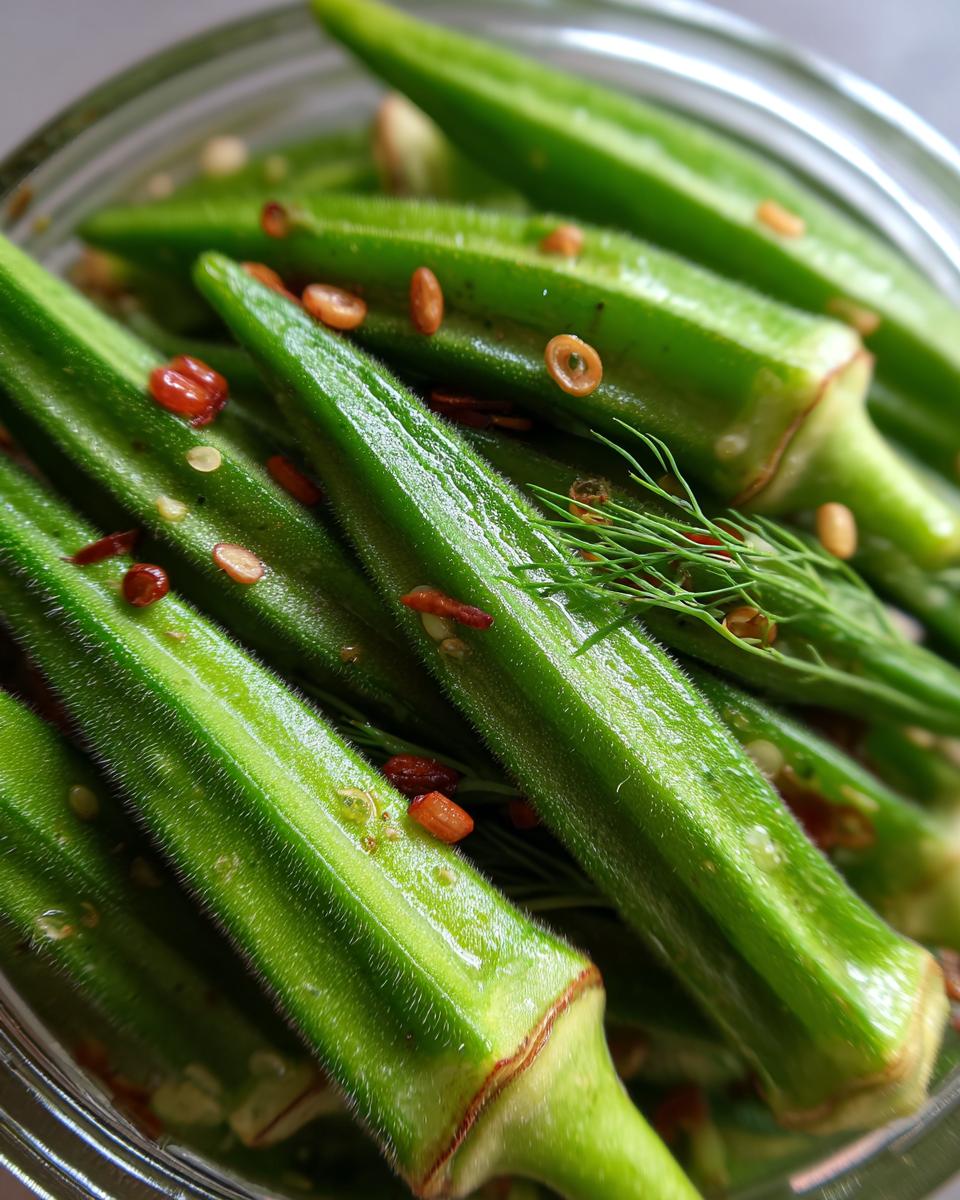
Oh, the absolute *joy* of a truly crunchy pickle! There’s just something so satisfying, isn’t there? And when I first discovered how amazing okra transforms into a zesty pickled delight, it was a game-changer for my kitchen. This Crunchy Pickled Okra Recipe: A Zesty Delight in Jars is my go-to for a reason. It’s so simple, but the result? Pure magic! We’re talking a perfect balance of tang, a little kick of spice, and that oh-so-satisfying crunch in every bite. I remember my very first jar, I just couldn’t stop snacking on them straight from the fridge!
Why You’ll Love This Crunchy Pickled Okra Recipe
You are going to adore this pickled okra for so many reasons:
- Super Easy to Make: Seriously, you can whip this up with minimal fuss.
- That Amazing Crunch: We’re talking pickles that actually snap!
- Zesty, Tangy Flavor: It’s got just the right amount of zing to wake up any meal.
- Versatile Snack & Condiment: Perfect with sandwiches, burgers, or just straight from the jar!
- Great for Preserving: Loads of fun to make a batch and keep them in the fridge all season long.
Gather Your Ingredients for Crunchy Pickled Okra
Alright, let’s get our ducks (or should I say, okra?) in a row! To make these fantastic crunchy pickled okra delights, you’ll need:
- Fresh Okra: About 2 pounds. Make sure it’s nice and fresh, and just trim off those little stem ends.
- White Vinegar: We’ll need 2 cups of good old white vinegar.
- Water: Just 2 cups of water to balance out the brine.
- Kosher Salt: 2 tablespoons of kosher salt. This is important for flavor and preservation!
- Sugar: 1 tablespoon of sugar. It’s not for sweetness, really, but it helps mellow out the brine.
- Dill Seed: 1 teaspoon. This gives it that classic pickle flavor.
- Mustard Seed: 1 teaspoon. Adds a little something extra, trust me!
- Red Pepper Flakes: 1/2 teaspoon to start. You can totally add more if you like it spicy!
- Garlic: 4 cloves, just give them a good smash so they release their flavor.
- Fresh Dill: 4 sprigs. This really makes them sing!
Step-by-Step Guide to Making Crunchy Pickled Okra
Okay, let’s get down to business and make some awesome pickled okra! It’s honestly so straightforward, you’ll wonder why you didn’t start making these sooner. Just follow these simple steps and you’ll have jars of deliciousness ready to go.
Preparing the Okra for Pickling
First things first, we need to get our okra ready. Give those little guys a good wash under cool water. Then, and this is important for that nice texture, just snip off the stem ends. No need to get super fancy, just a quick trim is all they need!

Creating the Zesty Pickling Brine
Now for the magic potion – the brine! Grab a saucepan and pour in your white vinegar and water. Add the kosher salt and sugar. Pop it on the stove over medium-high heat and stir it all around until that salt and sugar are completely dissolved. Once it’s all dissolved and just starting to bubble away, take it off the heat. This perfect balance is key to that zingy pickle flavor we love.
Packing the Jars for Crunchy Pickled Okra
Time to get those jars filled! Grab some clean jars – I usually use pint-sized ones for this. Start by packing the trimmed okra into them snugly, but don’t cram them in there too tight. Then, toss in your smashed garlic cloves, those lovely sprigs of fresh dill, and sprinkle in the dill seed, mustard seed, and red pepper flakes. Try to spread them out so every jar gets a good mix of all those yummy flavors. Oh, and leave a little room at the top, about half an inch, for the brine. That’s called headspace, and it’s important!

Filling and Sealing the Jars
Carefully pour that hot brine you made earlier over the okra and spices in the jars. Make sure everything is submerged in the brine. Now, grab a damp paper towel and wipe the rims of the jars really well. This is a crucial step to ensure a good seal! Then, just put on your lids and twist the bands on until they’re fingertip tight. It’s exciting to see them all filled up, isn’t it?

My secret tip for making sure those rims are perfectly clean? I actually give them a quick rinse after wiping to get any stray salt crystals off, then wipe them dry again right before putting the lid on. It adds an extra layer of insurance!
The Crucial Waiting Period for Perfect Pickled Okra
And here comes the hardest part – waiting! Let those jars cool down completely on your counter. Once they’re at room temperature, give them a lid check to see if they’ve sealed. Then, pop them into the refrigerator. Here’s the real secret: you *have* to let them chill in there for at least 24 hours. This is when all those amazing flavors meld together and the okra really gets that satisfying crunchy texture we’re after. Trust me, the wait is SO worth it!
Tips for Achieving the Best Crunchy Pickled Okra
Alright, my fellow pickle enthusiasts, let’s talk about making sure your okra is the absolute best it can be. A few little tricks up my sleeve can make all the difference between a good pickle and a *spectacular* one. For starters, always, always use the freshest okra you can find. It sounds obvious, but those little pods really do make a difference in the final crunch!
Don’t be shy with the red pepper flakes if you like a little heat – you can totally dial that up or down. And when you’re filling those jars, really make sure you wipe those rims clean before sealing them. I’ve found using a damp paper towel, then giving it a final quick dry wipe, truly ensures a solid seal every single time. Trust me on this one!
Also, remember that resting period? That’s non-negotiable! The okra needs that time in the fridge to get properly pickled and get that signature crunch back. If you’re impatient, I totally get it, but patience truly rewards you here. And hey, if you ever want to jazz them up even more, try a sprinkle of coriander seeds in the jar for an extra layer of flavor! It’s a little tweak that adds a lot.
Ingredient Notes and Substitutions for Your Crunchy Pickled Okra
Let’s chat a little about some of these ingredients, shall we? For the brine, plain old white vinegar is absolutely perfect. It’s got that nice neutral acidity that really lets the other flavors shine through. You could fiddle with apple cider vinegar, but honestly, white vinegar is the star for that bright pickle taste. And for salt, sticking with kosher salt is best because it dissolves nicely and doesn’t have any anti-caking chemicals. But if you only have regular table salt, just use a little less, maybe 1.5 tablespoons instead of 2, as it’s more potent.
Those little dill seeds and mustard seeds are total flavor powerhouses! They give that classic pickle vibe you expect. If by chance you can’t find dill seed, don’t sweat it too much. You can skip it, or if you have dried dill weed, you can add about a teaspoon of that. For mustard seed, if you can’t find it, a few whole peppercorns could work as a substitute, or just leave it out if you’re really stuck, but they really do add a lovely depth.
Serving Suggestions and Variations for Pickled Okra
Okay, now that you’ve got these gorgeous jars of crunchy pickled okra, what do you do with them? Oh, my friend, the possibilities are endless! I absolutely love pulling them out to serve alongside a juicy burger or a hearty sandwich. They add that pop of texture and tang that just makes everything better. They’re also fantastic on a cheese board or an appetizer platter, nestled amongst crackers and other goodies. Seriously, they’re a little jar of happiness!
Want to mix things up? You can totally play around with the spice! Adding a few whole peppercorns or even some coriander seeds to the jar with the brine gives a lovely, subtle difference. And if you’re feeling brave and want some real heat, toss in a sliced jalapeño or two! It makes these pickled okra even more exciting. You can even add an extra clove or two of garlic if you’re a total garlic lover like me!
Storing and Reheating Your Pickled Okra
Alright, so you’ve made a beautiful batch of these tangy little wonders! Keeping them fresh is super easy. Just pop those jars straight into your refrigerator. If you’ve sealed them up right and they’ve been chilling, they should stay wonderfully crunchy and delicious for a good few weeks, maybe even a month or two! Just reach for them when you need that perfect pickle fix.
Now, about reheating – you really don’t need to! These pickles are meant to be enjoyed cold or at room temperature. They’re already perfectly preserved and ready to eat as-is. Just remember to keep an eye out for anything funky, like mold or a ‘off’ smell, which are signs they’ve gone bad. But honestly, they usually disappear way before that happens!
Frequently Asked Questions about Crunchy Pickled Okra
How do I make sure my pickled okra stays crunchy?
The secret to super crunchy pickled okra is using the freshest okra you can find and not overcooking the brine. We also just snip the ends, not cut them off entirely, and load them into the jars while the brine is hot but not boiling anymore. Letting them rest in the fridge for a full 24 hours is also key to getting that signature snap!
How long will my pickled okra last in the fridge?
They’re pretty sturdy little pickles! Once they’ve been in the fridge for at least 24 hours, you can expect them to last for several weeks, usually up to a month or even a bit longer. Just make sure they stay submerged in the brine and the jar is sealed properly. If anything looks or smells off, it’s best to toss them, but they usually disappear way before that!
Can I can these pickled okra for shelf stability?
This particular recipe is designed for refrigerator pickles. While you *can* adapt recipes for water bath canning, it’s a bit more involved to ensure they’re safe for shelf storage. For this recipe, just keep them chilled in the fridge. It’s super easy, and honestly, they disappear so fast you won’t have to worry about long-term storage!
How can I adjust the spice level in my pickled okra?
It’s totally up to you! The recipe calls for about half a teaspoon of red pepper flakes, which gives a nice tingle. If you like it mild, start with just a pinch, or skip them altogether. If you’re a fire-breather, feel free to double or even triple the red pepper flakes! You can also add a sliced jalapeño or two to the jars for extra kick.
Nutritional Information (Estimated)
Just a little heads-up here, folks! The nutrition info for homemade goodies can change a bit depending on exactly what you use. But for a serving of about 1/4 cup of these zesty pickled okra, you’re looking at roughly 20 calories, with minimal fat and protein. You’ll find about 5g of carbs and around 300mg of sodium, plus a touch of sugar. Pretty darn good for such a flavorful bite, right?
Print
Crunchy Pickled Okra
- Total Time: 30 min
- Yield: 4 cups 1x
- Diet: Vegetarian
Description
A zesty and crunchy pickled okra recipe perfect for preserving.
Ingredients
- 2 pounds fresh okra, trimmed
- 2 cups white vinegar
- 2 cups water
- 2 tablespoons kosher salt
- 1 tablespoon sugar
- 1 teaspoon dill seed
- 1 teaspoon mustard seed
- 1/2 teaspoon red pepper flakes
- 4 cloves garlic, smashed
- 4 sprigs fresh dill
Instructions
- Wash and trim the ends off the okra.
- In a saucepan, combine vinegar, water, salt, and sugar. Bring to a boil, stirring until salt and sugar dissolve. Remove from heat.
- Pack the okra into clean jars, adding garlic cloves, dill sprigs, dill seed, mustard seed, and red pepper flakes to each jar.
- Pour the hot brine over the okra, ensuring it is fully submerged. Leave about 1/2 inch headspace.
- Wipe the rims of the jars clean and secure the lids.
- Let the jars cool to room temperature, then refrigerate for at least 24 hours before serving.
Notes
- For best results, use fresh okra.
- Adjust red pepper flakes for desired heat level.
- Pickled okra will last in the refrigerator for several weeks.
- Prep Time: 20 min
- Cook Time: 10 min
- Category: Condiments
- Method: Preserving
- Cuisine: American
Nutrition
- Serving Size: 1/4 cup
- Calories: 20
- Sugar: 3g
- Sodium: 300mg
- Fat: 0g
- Saturated Fat: 0g
- Unsaturated Fat: 0g
- Trans Fat: 0g
- Carbohydrates: 5g
- Fiber: 2g
- Protein: 1g
- Cholesterol: 0mg
Keywords: pickled okra, crunchy okra, preserving, canning, spicy okra, dill okra, homemade pickles