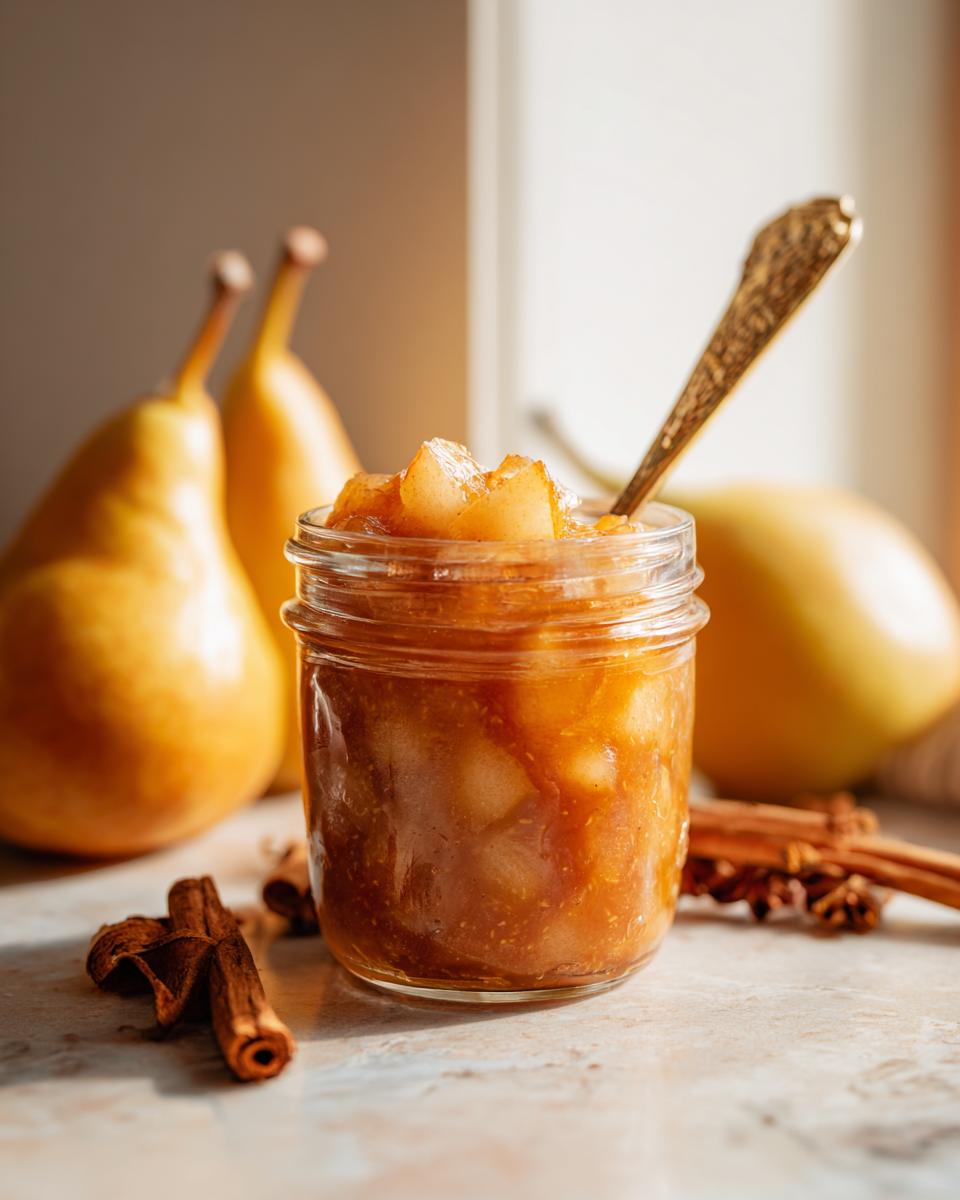
There’s something incredibly special about opening a jar of homemade preserves, isn’t there? That sweet, fruity aroma just transports you right back to cozy kitchens and simpler times. I remember my grandmother always having a jar of something delicious bubbling away on the stove, and the smell of pears cooking with cinnamon? Pure magic! That’s why I’m so excited to share this Irresistible Pear Preserves Recipe You’ll Love To Make with you. Seriously, it’s SO easy, even if you’ve never canned anything before, and the flavor is just out of this world. It’s the perfect balance of sweet, ripe pears and warm spices, and trust me, it’ll disappear fast!
Why This Irresistible Pear Preserves Recipe Will Be Your New Favorite
Okay, so why is this pear preserves recipe the ONE? Let me count the ways! First off, it’s unbelievably simple. You don’t need to be a master canner or have a fancy kitchen setup to nail this. Plus, the flavor? Oh my goodness, it’s just heavenly! You get that perfect sweet pear goodness with just enough warm spice from the cinnamon and nutmeg to make it feel extra cozy.
But the best part is how versatile it is. Think:
- Smothered on warm toast for breakfast.
- Swirled into plain yogurt or oatmeal.
- Dolloped on top of scones or biscuits.
- As a sweet glaze for roasted pork or chicken.
- Even tucked into the center of your next cookie batch!
And honestly, the feeling of pulling a perfectly sealed jar of your own homemade goodness off the shelf? Priceless! It’s a little taste of sunshine to enjoy all year round.
Gather Your Ingredients for Irresistible Pear Preserves
Alright, let’s get our little pear preserve party started! You don’t need a pantry full of exotic stuff for this; it’s all pretty straightforward. You’ll want about 4 cups of chopped ripe pears – I usually go for about six medium ones. Make sure they’re ripe but still a little firm, you know? Oh, and about 2 cups of good old granulated sugar. Don’t skimp here, sugar is actually key for preserving! We’ll also need a quarter cup of lemon juice – this brightens everything up and helps with the setting process. And for those warm, cozy vibes? A teaspoon of ground cinnamon and half a teaspoon of nutmeg. That’s it! Easy peasy, right?
Step-by-Step Guide to Making Irresistible Pear Preserves
Alright, let’s get down to business making these amazing pear preserves! It’s not as scary as it sounds, I promise. Think of it like a fun little kitchen science experiment that ends with deliciousness. Just follow these steps, and you’ll be a pro in no time. I always like to have my jam pot ready to go before anything else, and make sure all my tools are within reach. It makes the whole process so much smoother! It’s a bit like how I approach my garlic breadsticks – preparation is key!
Preparing Your Jars and Lids
First things first, we need to get our jars and lids all spiffed up and ready. Clean jars are super important for canning, so give them a good wash in hot, soapy water. Then, you want to keep them hot – I usually pop mine in a warm oven (around 200°F, or just on a low setting) while I’m making the preserves. This helps prevent them from cracking when we pour the hot jam into them. Same goes for the lids; just give them a quick rinse and set them aside in a bowl of hot water. Proper prep makes all the difference, just like in my perfect sponge cake recipe!
Cooking the Pear Mixture
Now for the fun part! Grab your biggest pot (seriously, use a big one, it bubbles up!) and toss in your chopped pears, sugar, lemon juice, cinnamon, and nutmeg. Give it all a good stir so everything is nicely coated. We’re going to cook this over medium-high heat. It’ll take a little bit to get going, but once it starts bubbling, keep stirring! You want it to come to a good, rolling boil and then just keep on boiling while you stir constantly. This part usually takes about 10 to 15 minutes, until it starts looking thick and glossy.
Testing for Set
This is the moment of truth! How do you know when it’s *just right*? My favorite trick, and the one Grandma always used, is the cold plate test. Keep a small plate in the freezer while you’re cooking. When you think the preserves are getting thick, carefully spoon a little bit onto that cold plate. Give it a minute to cool down, then gently push it with your finger. If it wrinkles up a bit, it’s ready! If it’s still runny, just keep simmering and test again in a few minutes. Don’t worry if it takes a couple of tries!
Jarring and Sealing Your Pear Preserves
Okay, the preserves are cooked and ready to go! Carefully ladle the hot preserves into your warm jars. You want to leave about a quarter-inch of space at the top, which we call headspace. It’s important for a good seal. Next, wipe those jar rims *really* well with a damp cloth to get rid of any stray bits of jam or sugar – this is crucial for the lids to seal properly. Pop on your lids and then screw on the bands until they’re just fingertip tight. Don’t crank them down super hard.
Water Bath Canning Process
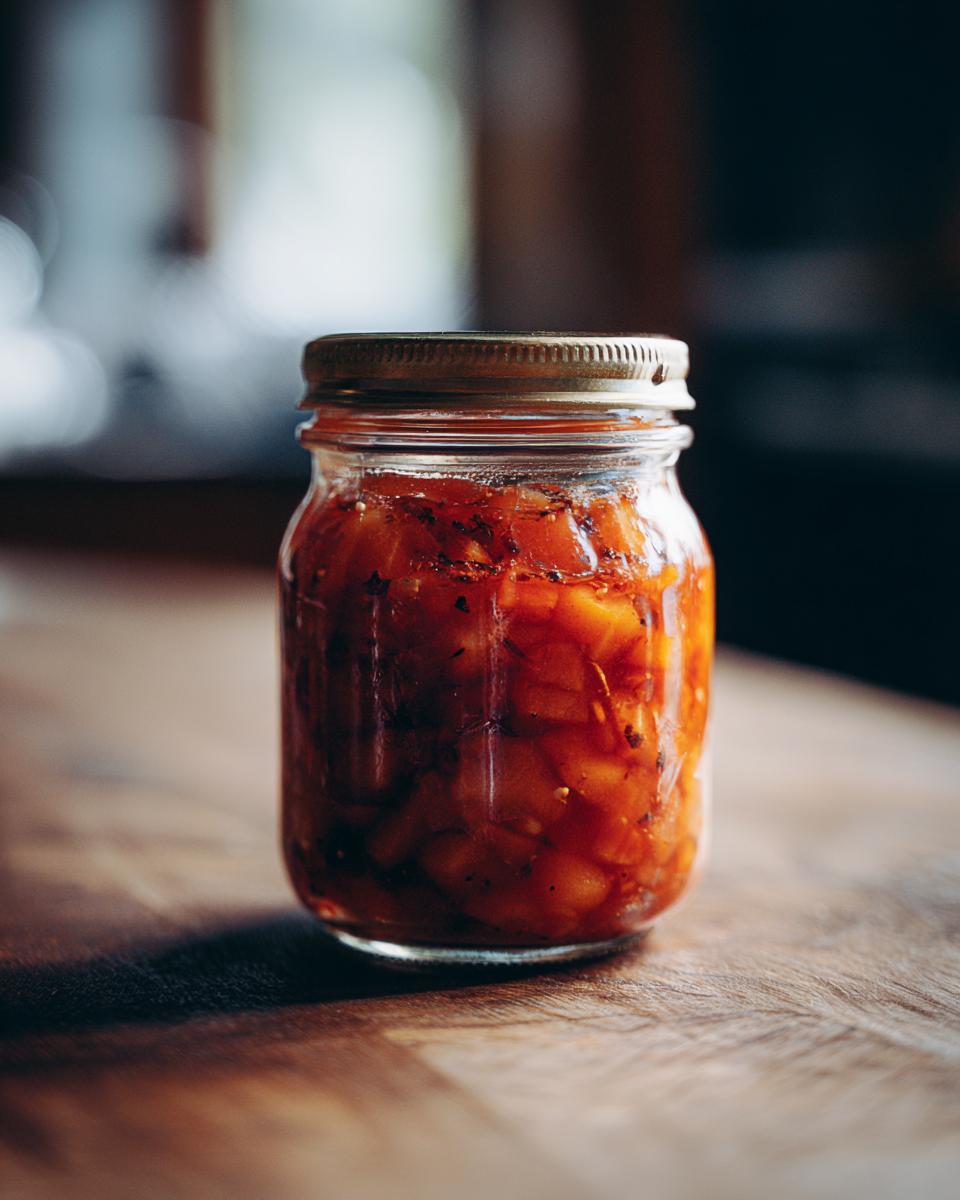
Now we’re going to make sure these beauties last on the shelf! Get a large pot with a rack in the bottom and fill it with enough water to cover your jars by at least an inch. Bring that water to a rolling boil. Carefully place your filled jars into the boiling water. Make sure they aren’t touching each other. Put the lid on your canner and let them process for 10 minutes. Once the time is up, turn off the heat and let the jars sit for another 5 minutes before carefully lifting them out with a jar lifter. Place them on a towel-lined counter and let them cool completely, undisturbed, for at least 12 to 24 hours. You’ll hear them ping as they seal – it’s the best sound!
Tips for Perfect Pear Preserves Every Time
Okay, so you’ve made these gorgeous pear preserves, but you want them to be *absolutely perfect* every single time? Trust me, a few little tricks make all the difference! First off, pear selection is HUGE. You want pears that are ripe – they’ll be fragrant and give a little when you squeeze them gently – but not mushy! A slightly firmer pear holds its shape better in the preserves. Think Bosc or Anjou; they tend to have a nice texture. And don’t be afraid to play with the spices! If you love cinnamon, add an extra pinch. If nutmeg is your jam, go for it. I’ve tinkered with the spice amounts loads of times, like I do with my coconut lemon curd cookies, to get them just right for my taste.
Now, about that setting issue – it happens to the best of us! If your preserves are too runny after testing, just pop them back on the heat for a few more minutes, stirring constantly. Make sure you’re getting a good rolling boil. Also, sometimes the type of pear or how ripe it is can affect how well it sets. If you’re worried, a little extra lemon juice can help activate the natural pectin. Remember, patience is key, and the results are SO worth it!
Ingredient Notes and Substitutions for Pear Preserves
Let’s chat a little more about what goes into these gorgeous jars of yum! Pears are the star here, of course. While I love using Bosc or Anjou for their lovely texture, almost any ripe pear will work beautifully. Just make sure they aren’t *too* soft. The sugar isn’t just for sweetness, it’s a crucial part of the preservation process, so I really wouldn’t substitute that. But the lemon juice? That little bit of acidity is key! It brightens up the pear flavor and also helps the natural pectin in the pears do its job to get that lovely set. If you don’t have granulated sugar, you could try a standard white sugar, but the brown sugar adds a little extra depth, which I find lovely. For the spices, feel free to play around! A pinch of ginger or a tiny bit of cardamom could be fun additions too, but cinnamon and nutmeg are my go-to for that classic warmth.
Serving Suggestions for Your Homemade Pear Preserves
So, you’ve got these beautiful jars of homemade pear preserves… now what? Oh, honey, the possibilities are ENDLESS! Of course, they’re dreamy on a slice of toasted sourdough or a warm, buttery biscuit. But don’t stop there! These preserves are divine with a sharp cheddar on a cheese board, or swirled into a bowl of thick, creamy Greek yogurt. You can even use them as a sweet glaze for roasted pork or chicken – seriously, it’s a game-changer! They’re also fantastic dolloped on top of my creamy potato soup for a sweet counterpoint. Basically, anywhere you need a little burst of sweet, spiced pear goodness, these jars have got you covered!
Storage and Reheating Instructions for Pear Preserves
Alright, you’ve braved the canning process and ended up with these gorgeous jars of pear preserves! Now, how do we keep them safe and delicious? Sealed jars are magic – they’ll last for a good year, maybe even longer, in a cool, dark place like your pantry. Just check that the lid is still concave (curved downwards) and hasn’t popped up before opening. Once you pop open a jar, treat it like jam and keep it in the refrigerator. It should be good for about 3-4 weeks. And the best part? Most of the time, you don’t need to reheat them! They’re perfect straight from the jar for spreading. If you absolutely wanted them warmer for some reason, just gently warm a small amount in a saucepan over low heat, but honestly, they’re best chilled!
Frequently Asked Questions about Irresistible Pear Preserves
Got questions about whipping up these delightful pear preserves? I totally get it! Canning can seem a little intimidating at first, but once you get the hang of it, it’s so rewarding. Here are a few things people often ask:
Can I use different types of pears for this recipe?
Oh yes, absolutely! While I adore mine with Bosc or Anjou, most ripe pears will work wonderfully. Just try to avoid ones that are super mushy, as they can break down too much. The riper they are, the sweeter they’ll be!
My preserves didn’t set. What went wrong?
Don’t fret! This happens. It usually means there wasn’t enough pectin (natural or from the lemon juice) or it didn’t concentrate enough. Try simmering them a little longer, stirring constantly, and making sure you’re getting a good rolling boil. Sometimes, a little extra lemon juice can help too.
How long will my pear preserves last?
Properly sealed jars are shelf-stable for about a year, maybe even a bit longer, when stored in a cool, dark place. That satisfying ‘pop’ when you open them is your guarantee!
Can I make this recipe without canning?
You sure can! Just cool the preserves completely and store them in airtight containers in the refrigerator. They’ll be delicious for about 3-4 weeks, but keep in mind they won’t last as long as canned ones and won’t be shelf-stable.
Estimated Nutritional Information
Alright, so we’ve got our sweet, spiced pear preserves ready to go! While this is all about delicious comfort food rather than strict healthy eating, it’s good to have a ballpark idea of what you’re enjoying. Based on the recipe, a 2-tablespoon serving gives you about 70 calories, mostly from the natural sugars in the fruit and the added sugar. There’s practically no fat or protein, and a good amount of carbohydrates from those sugars. Remember, this is just an estimate, and the exact numbers can wiggle a bit depending on your pears’ sweetness and brands!
Print
Irresistible Pear Preserves
- Total Time: 45 min
- Yield: 4 half-pint jars 1x
- Diet: Vegetarian
Description
A simple recipe for sweet and delicious pear preserves.
Ingredients
- 4 cups chopped ripe pears (about 6 medium)
- 2 cups granulated sugar
- 1/4 cup lemon juice
- 1 teaspoon ground cinnamon
- 1/2 teaspoon ground nutmeg
Instructions
- Prepare your jars and lids by washing them and keeping them hot.
- In a large pot, combine the chopped pears, sugar, lemon juice, cinnamon, and nutmeg.
- Stir well to combine.
- Cook over medium-high heat, stirring frequently, until the mixture comes to a rolling boil.
- Continue to boil, stirring constantly, for about 10-15 minutes, or until the preserves thicken. To test for doneness, drop a small amount onto a cold plate; it should set up.
- Remove from heat.
- Carefully ladle the hot preserves into the prepared jars, leaving 1/4 inch headspace.
- Wipe the rims of the jars clean and place the lids on.
- Screw on the bands until fingertip tight.
- Process the jars in a boiling water bath for 10 minutes.
- Remove jars from the water bath and let them cool completely on a towel-lined counter.
- Check seals after 12-24 hours.
Notes
- For best results, use ripe but firm pears.
- Adjust spices to your preference.
- Ensure your jars are properly sealed for long-term storage.
- Prep Time: 20 min
- Cook Time: 25 min
- Category: Dessert
- Method: Canning
- Cuisine: American
Nutrition
- Serving Size: 2 tablespoons
- Calories: 70
- Sugar: 17g
- Sodium: 0mg
- Fat: 0g
- Saturated Fat: 0g
- Unsaturated Fat: 0g
- Trans Fat: 0g
- Carbohydrates: 18g
- Fiber: 1g
- Protein: 0g
- Cholesterol: 0mg
Keywords: pear preserves, homemade jam, fruit preserves, canning pears, cinnamon pear preserves, easy preserves