Oh, hello there! If you’re anything like me, you love a good dessert that doesn’t demand hours in the kitchen. That’s exactly why I’m so excited to share my go-to recipe for Easy Custard with Self-Crusting Flour. Seriously, this stuff is pure magic! I stumbled upon this gem years ago when I was looking for something comforting and simple to whip up after a long day, and it quickly became a family favorite. The best part? It practically makes its own crust as it bakes, giving you that lovely layered texture with hardly any fuss. Trust me, this is the kind of dessert that makes you feel like a baking pro without breaking a sweat!

Why You’ll Love This Easy Custard with Self-Crusting Flour
This recipe is an absolute dream for anyone who wants a delicious, homemade dessert without the fuss. It’s perfect for those busy weeknights or when you just need a little something sweet. Here’s why it’s a winner:
- Incredibly Simple: Seriously, you just whisk everything together in a couple of bowls. No fancy techniques needed!
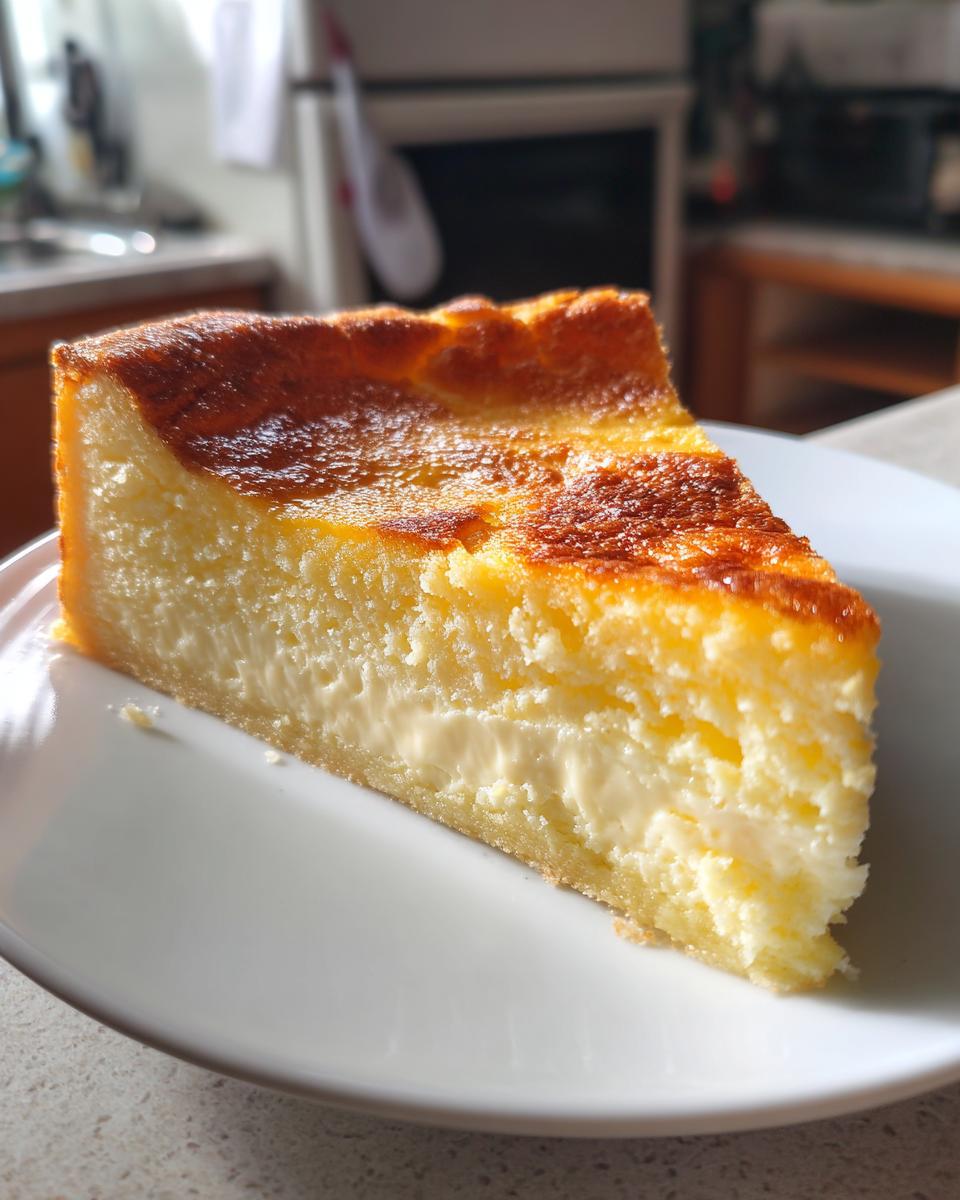
- Dreamy Texture: It bakes up so beautifully creamy and smooth. It’s pure comfort in a dish.
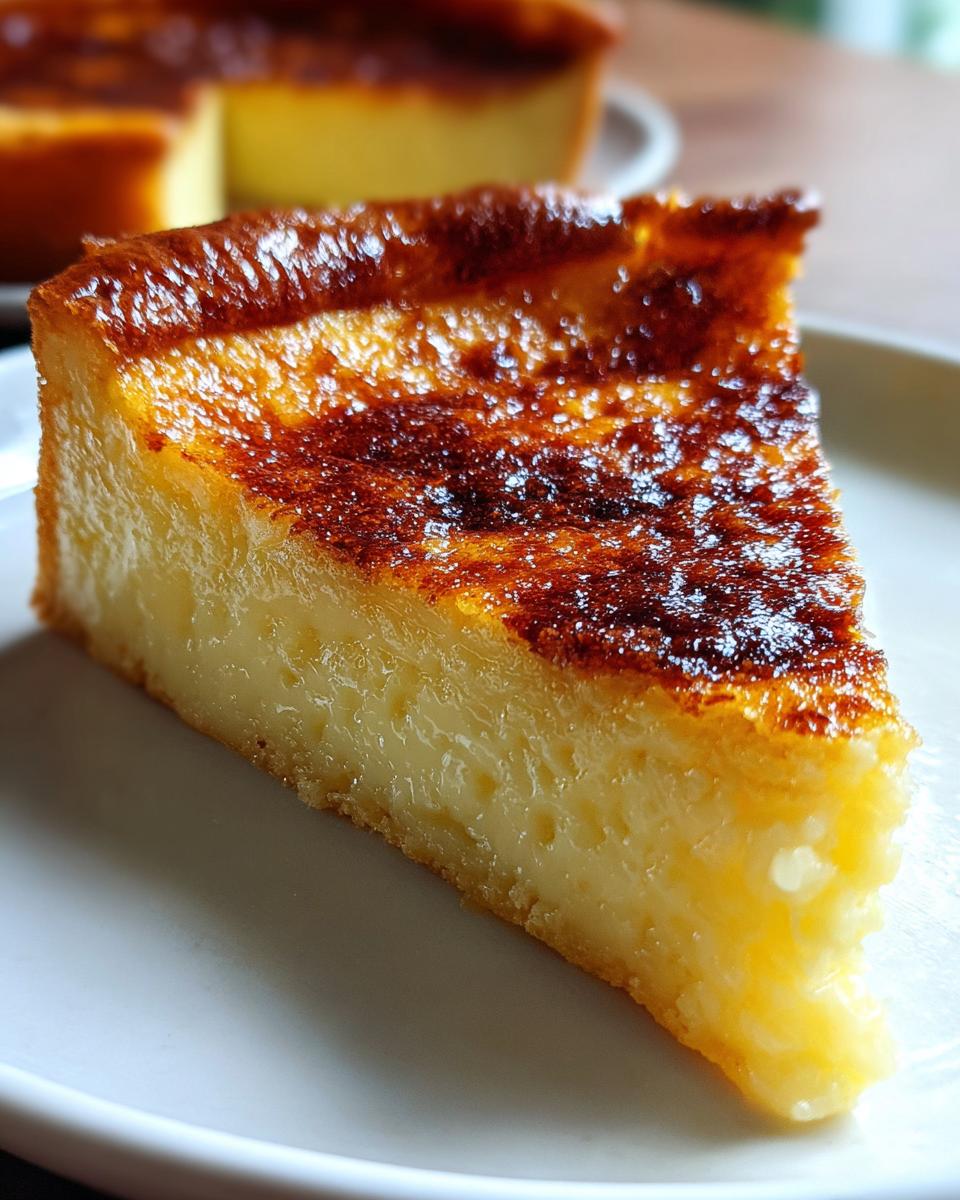
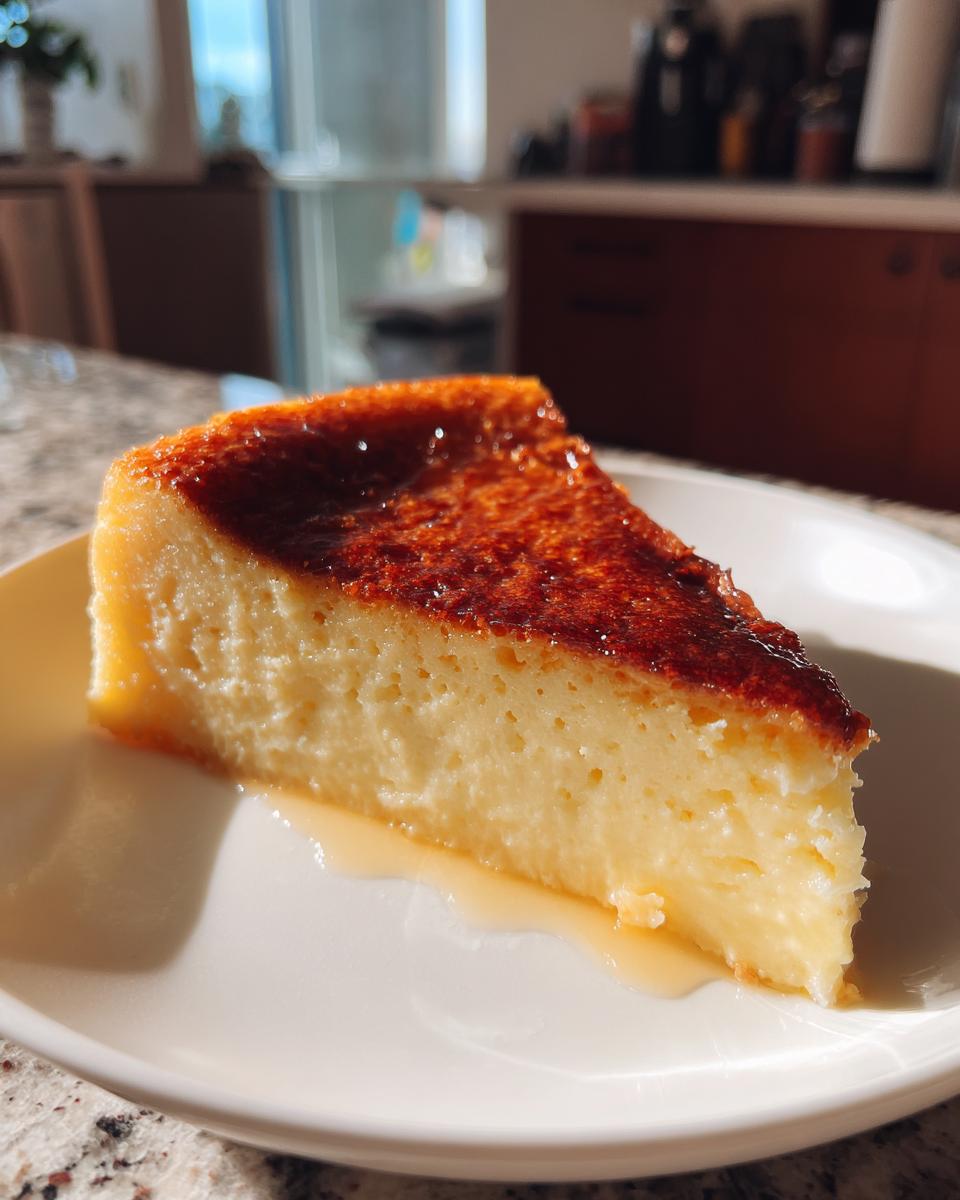
- The Self-Crusting Wonder: This is the best part! As it bakes, it magically separates into layers – a soft custard on top and a delicate cake-like layer on the bottom. It’s like two desserts in one!
It’s the kind of recipe that makes you feel accomplished without all the stress. Plus, who doesn’t love a dessert that does a little bit of the work for you?
The Magic of Self-Crusting Custard
Okay, so what’s the secret to this “self-crusting” magic? It’s all about the way the ingredients interact when they bake! When you mix the flour, sugar, milk, and eggs just right, the batter naturally separates in the oven. The heavier ingredients sink to the bottom, forming a lovely cakey layer, while the lighter, creamier part bakes on top. It’s not complicated chemistry, it’s just pure baking goodness that happens all on its own. You don’t need to do anything special; just pour it in the dish and let the oven work its wonders. It’s honestly one of my favorite parts about this recipe – it feels like a little miracle happening right in your baking dish! For more on the science behind baking, you can explore resources on the science of cooking.
Gathering Your Ingredients for Easy Custard with Self-Crusting Flour
Alright, let’s get down to business! The beauty of this Easy Custard with Self-Crusting Flour recipe is that it uses simple, everyday ingredients you probably already have in your pantry. No need for a special trip to the store! Just gather these few things, and you’re well on your way to a delightful dessert. It’s so straightforward, you can even get the kids involved in measuring everything out. Having everything ready to go makes the whole process feel super smooth, and trust me, when that custard is baking, you’ll be glad you had all your ducks in a row!
Essential Ingredients
- 1 cup all-purpose flour
- 1 cup granulated sugar
- 4 cups whole milk
- 4 large eggs
- 1 teaspoon pure vanilla extract
- 1/4 teaspoon salt
Step-by-Step Guide to Making Your Easy Custard with Self-Crusting Flour
Alright, now for the fun part! Making this Easy Custard with Self-Crusting Flour is honestly a breeze. It’s more about putting ingredients together than complicated steps, which is exactly what we want, right? Just follow along, and you’ll have a gorgeous, layered custard before you know it. I love how straightforward this process is; it really lets the ingredients do their thing!
Preparing Your Baking Dish and Oven
First things first, let’s get that oven ready. You’ll want to preheat it to 350°F (175°C). While that’s heating up, grab your 9×9 inch baking dish and give it a good grease. I usually just use a little butter or cooking spray, making sure to get all the corners. This little step is super important to make sure your custard doesn’t stick!
Mixing the Dry Ingredients
Grab a nice big bowl – you’ll need some room to whisk! Toss in your 1 cup of all-purpose flour, 1 cup of granulated sugar, and that pinch of salt. Give it all a good whisk together. You want to make sure everything is nicely combined so you don’t end up with pockets of just flour or sugar. It’s like laying the foundation for our delicious custard.
Preparing the Wet Ingredients
Now, in a separate bowl, crack your 4 large eggs. Just give them a gentle whisk until they’re lightly beaten. No need to go crazy here! Then, slowly, and I mean *slowly*, start whisking in your 4 cups of milk. Adding the milk gradually helps everything combine smoothly and keeps the eggs from getting all weird and clumpy. It’s a little patience now for a super smooth batter later!
Combining Wet and Dry for Easy Custard with Self-Crusting Flour
Here comes the magic part! Pour all those lovely wet ingredients from the second bowl right into the big bowl with your dry ingredients. Now, whisk it all together. Keep whisking until you have a nice, smooth batter. You shouldn’t see any dry flour bits hiding in there. This is where our self-crusting wonder starts to take shape!
Adding the Flavor and Pouring the Batter
Almost there! Stir in your 1 teaspoon of pure vanilla extract. This is what gives our custard that classic, comforting flavor. Once that’s mixed in, just pour the whole glorious batter into that greased baking dish you prepped earlier. See? So easy! It’ll look pretty liquidy right now, but trust the process!
Baking Your Self-Crusting Custard to Perfection
Pop that dish into your preheated oven. Now, let it bake for about 40 to 50 minutes. You’ll know it’s ready when the top is lightly golden and looks set. It shouldn’t be jiggly in the center anymore. A good way to check is to gently nudge the dish; the edges should be firm, and the center should have just a little bit of a wobble, like a perfectly set Jell-O. Don’t overbake it, or it might get a bit rubbery. Patience is key here!
Tips for Perfect Easy Custard with Self-Crusting Flour Every Time
Okay, so you’ve made this amazing Easy Custard with Self-Crusting Flour, and you want it to be perfect every single time, right? I’ve picked up a few tricks over the years that really make a difference. It’s not complicated, just little things that ensure you get that silky smooth custard and that lovely cakey bottom, just like magic!
Ingredient Quality Matters
You know, I truly believe good ingredients make good food. For this custard, using fresh eggs and decent quality milk really does shine through. And don’t skimp on the vanilla extract – pure vanilla makes all the difference in flavor! It’s these simple things that elevate a basic dessert into something truly special.
Achieving the Perfect Set
Ovens can be a bit quirky, can’t they? If your oven runs a little hot, your custard might bake too fast and get a bit rubbery. If it’s cooler, it might take longer. My best advice? Keep an eye on it after about 35 minutes. That gentle wobble in the center is your cue – it means it’s cooked through but still wonderfully creamy. Don’t be afraid to adjust the time a bit based on your oven!
The Importance of Complete Cooling
This is a big one, trust me! You *have* to let this custard cool down completely. I know it’s tempting to dive in while it’s warm, but that’s when the magic really happens. As it cools, the layers set up perfectly, and that self-crusting goodness firms up beautifully. Chilling it in the fridge for a few hours is even better. It makes the texture absolutely divine!
Understanding the Nutritional Profile of Your Easy Custard with Self-Crusting Flour
Just a little heads-up, the nutritional info for homemade goodies like this Easy Custard with Self-Crusting Flour can really vary! It depends on the exact brands of ingredients you use, like the milk and sugar, and even how you measure them. So, please take the numbers you might see as a general guide. They’re a helpful estimate, but not an exact science for your specific batch! For general nutritional information on dairy products, you can consult resources from the Dietary Guidelines for Americans.
Frequently Asked Questions about Easy Custard with Self-Crusting Flour
Got questions about my favorite Easy Custard with Self-Crusting Flour? I totally get it! It’s one of those recipes that seems a little too good to be true. Here are some common things people ask, and my best advice!
Can I use different types of milk?
You sure can! Whole milk gives you the richest, creamiest result, and that’s what I always use. But if you’re looking for something a bit lighter, 2% milk will work, though it might not be quite as decadent. Skim milk is a bit too watery and might affect that lovely self-crusting texture. As for plant-based milks, like almond or soy, they can work, but they might change the flavor and texture a bit, and some don’t have the same fat content to help with the crust formation. I’d stick with dairy milk for the best outcome with this particular recipe!
How do I store leftovers?
Oh, leftovers! If you somehow manage to have any, just pop them into an airtight container. You can keep it in the refrigerator for about 3 to 4 days. It’s actually really yummy cold, straight from the fridge! Some people even like to scoop it out and let it come to room temperature for a bit before eating. Just make sure it’s covered well so it doesn’t pick up any weird fridge smells.
What if my custard doesn’t form a crust?
Don’t you worry if your first attempt doesn’t look exactly like mine, it happens! The most common reasons for a lack of crust are usually oven temperature or how long it cooled. Make sure your oven is truly at 350°F (175°C) – ovens can be tricky! Also, and this is super important, you *must* let the custard cool completely. Like, all the way down. That cooling period is when the magic really happens and those layers set up. If it’s still warm, the layers won’t have had a chance to form properly. Give it time, and it should come together!
Enjoying Your Easy Custard with Self-Crusting Flour
Now that you’ve made this wonderful Easy Custard with Self-Crusting Flour, it’s time for the best part – eating it! It’s pretty fantastic all on its own, especially when it’s chilled and those lovely layers have had time to set. But if you feel like dressing it up a bit, I’ve got a few ideas!
Serving Suggestions
Honestly, a simple scoop of this custard is pure bliss. But if you want to add a little something extra, try topping it with some fresh berries – raspberries or blueberries are divine! A little dollop of whipped cream never hurt anyone, either. And for a cozy touch, a tiny dusting of cinnamon or a sprinkle of nutmeg on top can really bring out those comforting flavors. I’d love to hear how you enjoy yours! Let me know in the comments below!
If you enjoyed this recipe, you might also like our Cheesecake Deviled Strawberries or our Honing Pistache Baklava Cheesecake for more delightful desserts!
Print
Magische Custard: 1x makkelijk en heerlijk
- Total Time: 55 minutes
- Yield: 6-8 servings 1x
- Diet: Vegetarian
Description
A simple recipe for a creamy, self-crusting custard that requires minimal effort.
Ingredients
- 1 cup all-purpose flour
- 1 cup granulated sugar
- 1 teaspoon vanilla extract
- 4 cups milk
- 4 large eggs
- 1/4 teaspoon salt
Instructions
- Preheat your oven to 350°F (175°C). Grease a 9×9 inch baking dish.
- In a large bowl, whisk together the flour, sugar, and salt.
- In a separate bowl, whisk the eggs until lightly beaten.
- Gradually whisk the milk into the egg mixture.
- Pour the wet ingredients into the dry ingredients and whisk until smooth.
- Stir in the vanilla extract.
- Pour the batter into the prepared baking dish.
- Bake for 40-50 minutes, or until the custard is set and lightly golden.
- Let it cool completely before serving.
Notes
- For a richer custard, you can use half-and-half instead of milk.
- Adjust sugar to your preference.
- Ensure the custard is fully cooled for best texture.
- Prep Time: 10 minutes
- Cook Time: 45 minutes
- Category: Dessert
- Method: Baking
- Cuisine: American
Nutrition
- Serving Size: 1 serving
- Calories: 250
- Sugar: 30g
- Sodium: 150mg
- Fat: 8g
- Saturated Fat: 4g
- Unsaturated Fat: 4g
- Trans Fat: 0g
- Carbohydrates: 40g
- Fiber: 1g
- Protein: 7g
- Cholesterol: 80mg
Keywords: easy custard, self-crusting, simple dessert, baked custard, vanilla custard