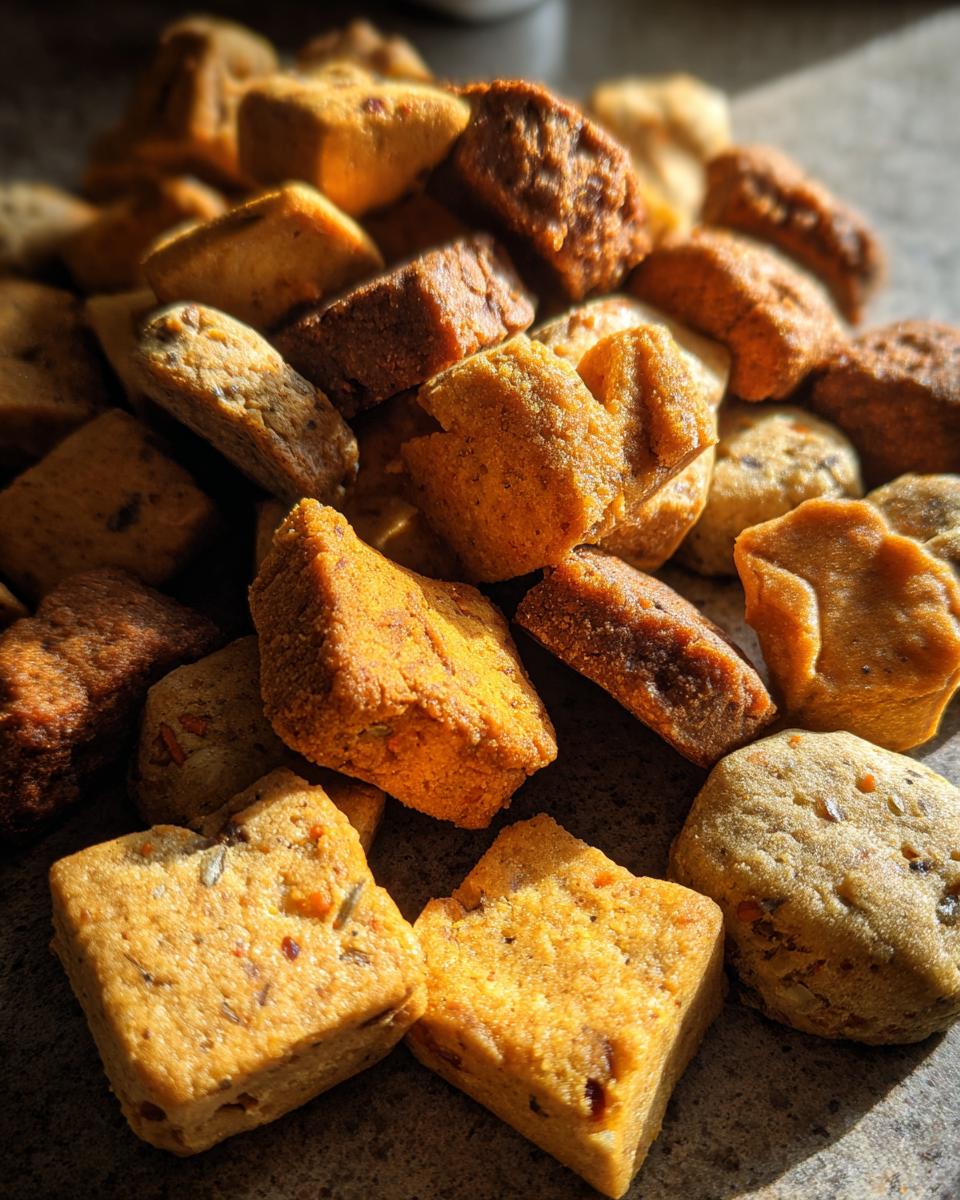
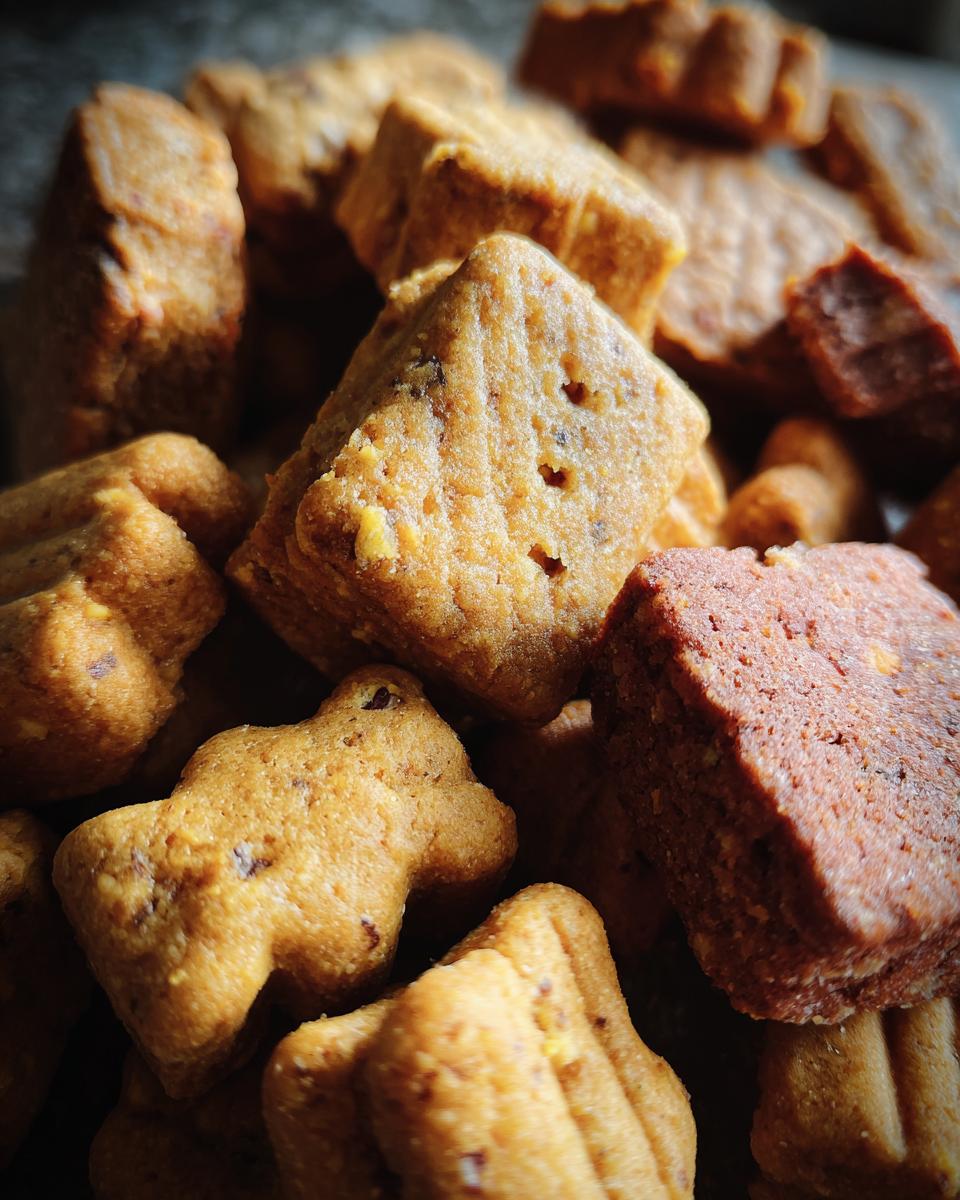
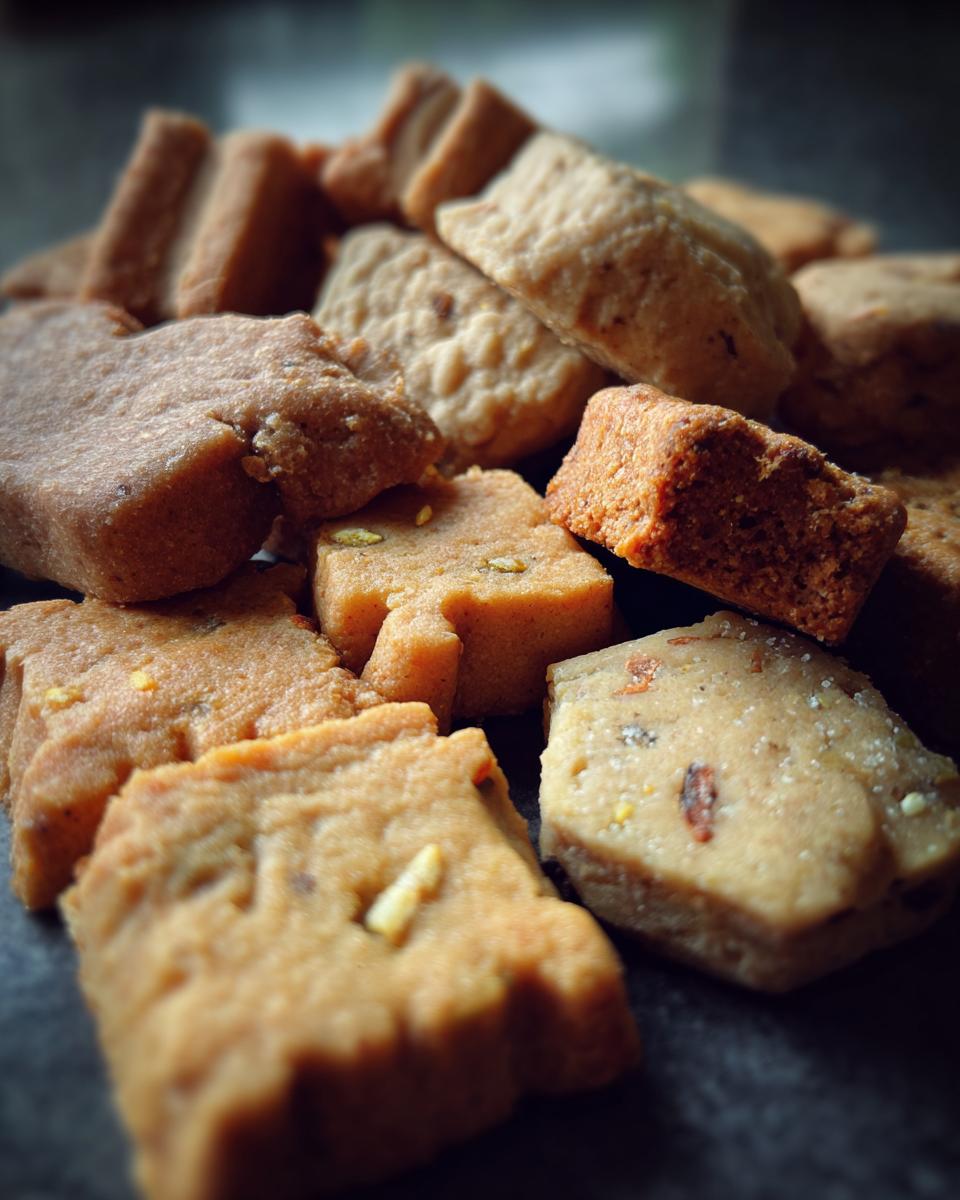
Oh, I just LOVE spoiling my furry best friend, Buster, and honestly, nothing makes me happier than seeing his tail wag a mile a minute when he gets a special homemade treat! But you know, Buster can get a little bored with the same old thing, so I’ve learned that having a good homemade dog treats variety on hand is key to keeping him excited. Plus, knowing exactly what goes into his snacks? It’s such a relief! This recipe is my go-to because it’s super simple, uses ingredients I usually have anyway, and you can whip up a whole batch in no time. Buster absolutely devours these, and I feel great knowing I’m giving him something healthy and delicious. It really is the best way to show them some love!
Why You’ll Love This Homemade Dog Treats Variety
Honestly, making these treats is a total win-win! For you, it’s super quick and easy to whip up a batch, and you get that amazing feeling of knowing exactly what’s going into your dog’s tummy. No weird fillers or mystery ingredients here! Plus, you can totally play around with add-ins to make them extra special for your pup. And for your furry friend? Well, they get delicious, healthy snacks that are way better than anything from the store. The best part is the variety – keeping their treat jar interesting means a happier dog, and that’s priceless!
- Quick and easy to make
- Uses wholesome, simple ingredients
- Customizable with dog-safe add-ins
- A healthy alternative to store-bought treats
- Your dog will love the variety!
Gathering Your Ingredients for Homemade Dog Treats Variety
Alright, let’s talk about what you’ll need to whip up these fantastic homemade dog treats! It’s pretty straightforward, and honestly, having these staples on hand is great for Buster’s treat jar. First up, we need 1 cup of whole wheat flour. It’s a good base that most dogs tolerate well. Then, we’re adding 1/2 cup of rolled oats for a little texture and extra fiber. These are the plain rolled oats, not the instant kind, okay?
Now for the star of the show for many pups: 1/4 cup of peanut butter. This is super important, guys: make sure it’s absolutely xylitol-free. Seriously, xylitol is really dangerous for dogs, so double-check the label! Next, we’ve got 1/4 cup of unsweetened applesauce. This adds a nice bit of moisture and a hint of sweetness that Buster just adores. Just a little bit of 1 tablespoon of honey goes in for extra flavor and binding power – remember, moderation is key here. And to hold it all together, we need 1 large egg. If you’re feeling fancy or want to add a little extra goodness, you can totally throw in some optional small pieces of dog-safe fruits or vegetables. Think a few blueberries or some finely chopped carrot – Buster loves when I mix in tiny bits of apple!
Essential Equipment for Homemade Dog Treats Variety
Okay, so you’ve got your ingredients, but what do you actually need to make these goodies? It’s pretty basic kitchen stuff, honestly. You’ll want a large mixing bowl to get everything combined without making a huge mess. Good old measuring cups and spoons are a must, of course, to get the ratios just right. You’ll need a baking sheet to lay out your treats, and I *highly* recommend using parchment paper on it. It makes cleanup a breeze and stops those yummy treats from sticking! Grab a rolling pin for getting the dough to the perfect thickness. And if you want to make them extra cute, don’t forget your cookie cutters – Buster loves his little bone-shaped ones!
Step-by-Step Instructions for Homemade Dog Treats Variety
Okay, ready to get baking? It’s really not complicated at all, and watching your dog go crazy for these makes it totally worth it! First things first, go ahead and preheat your oven to 350°F (175°C). While that’s warming up, grab your baking sheet and line it with parchment paper. Trust me, this step is a lifesaver for cleanup!
Now, grab your big mixing bowl. We’re going to combine the whole wheat flour and rolled oats in there. Give that a quick little whisk or stir just to get them mixed. Next, it’s time to add the wet ingredients and the yummy stuff: toss in the peanut butter, applesauce, honey, and that egg right on top of the dry stuff.
Get your hands in there, or use a sturdy spoon, and mix everything until a nice, firm dough forms. It should be easy to handle. If it feels too dry and crumbly, just add a tiny splash of water, like a teaspoon at a time, until it comes together. If it’s too sticky, add a little more flour, again, just a tablespoon or so. If you decided to add those little bits of fruit or veggies, now’s the time to gently mix them in. Don’t overdo it; just want a few little surprises!
Next, lightly dust your counter or a clean surface with a bit of flour and roll out the dough to about 1/4 inch thickness. You don’t want it too thin, or they’ll get crispy, and we want them a little chewy and firm. Now for the fun part – cut out your shapes! Use whatever cookie cutters you have, or if you’re feeling lazy like me sometimes, just use a knife to score them into little squares or rectangles. Pop these onto your prepared baking sheet.
Into the oven they go! Bake them for about 15 to 20 minutes. You’re looking for them to be golden brown and feel firm when you gently touch them. Ovens can be a little different, so keep an eye on them towards the end. Once they’re done, take them out and let them cool completely on a wire rack. This is important because they’ll firm up even more as they cool, and you don’t want to give your pup a warm treat!
Tips for Perfect Homemade Dog Treats Variety
Okay, so you’ve got your dough ready and you’re about to bake, but here are a few little tricks I’ve learned to make sure these homemade dog treats variety come out just right every single time. First off, dough consistency is totally key! If it feels a bit too crumbly, don’t panic – just add a teaspoon of water. If it’s too sticky, a little sprinkle of flour will do the trick. You want it just right so it rolls out nicely without sticking everywhere.
Also, baking time can be a bit finicky. My oven likes to run a little hot, so my treats usually bake in about 15 minutes. Yours might take the full 20, or even a couple minutes more, especially if you roll them a bit thicker. Just keep an eye on them and look for that golden-brown goodness. And super important: make sure they are completely, totally, 100% cool before you hand them over to your eager pup. Nobody wants a burnt tongue, right?
Ingredient Notes and Substitutions for Homemade Dog Treats Variety
When you’re whipping up these yummy homemade dog treats variety, a couple of ingredient notes are super important to keep your pup safe and happy. First and foremost, that peanut butter? It absolutely *has* to be xylitol-free. Seriously, I can’t stress this enough – xylitol is incredibly toxic to dogs, so always double-check that label before you scoop!
Now, if Buster ever has a sensitive tummy or you know your dog does, don’t sweat it! You can totally experiment with different flours. A good quality gluten-free flour blend usually works wonderfully as a substitute for the whole wheat. And for the honey? While I love adding just a touch for flavor and binding, if your dog doesn’t need the extra sweetness or you’re trying to cut back, you can absolutely omit it. Just make sure the dough still comes together nicely!
Storing Your Homemade Dog Treats Variety
Alright, so you’ve made a whole batch of these amazing homemade dog treats variety, and you want them to stay fresh and yummy for your pup, right? Easy peasy! For short-term storage, just pop them into an airtight container. I usually keep mine in the fridge, and they’re good for about a week that way. Buster tends to gobble them up way before then, though!
If you’re a super planner or just want to have treats on hand for longer, freezing is your best friend. Just pop the cooled treats into a freezer-safe bag or container. They’ll keep for a good couple of months, and you can just thaw a few out whenever your furry friend deserves a special snack!
Frequently Asked Questions About Homemade Dog Treats Variety
Got questions about these super simple homemade dog treats variety? I totally get it! It’s good to know the deets when you’re baking for your furry family members. So, let’s dive in!
Q: How long do these homemade dog treats variety last?
A: Great question! If you store them in an airtight container in the fridge, they’ll stay fresh and tasty for about a week. But honestly, Buster usually gobbles them up way faster than that! For longer storage, just pop them in a freezer-safe bag, and they’ll be good to go for a couple of months.
Q: Can I add other ingredients to these dog treat recipes?
A: Absolutely! That’s the best part about making your own dog snacks. You can totally toss in small amounts of dog-safe fruits or veggies. Think tiny bits of carrot, a few blueberries, or even some cooked sweet potato! Just always, always make sure whatever you add is safe for them to eat.
Q: What if my dog has allergies?
A: This is super important! If your pup has allergies or sensitivities, you can totally adapt this recipe. For example, you can swap out the whole wheat flour for a gluten-free blend if they’re sensitive to gluten. You can also leave out the honey if needed. But really, if your dog has specific dietary needs or known allergies, it’s always best to have a quick chat with your veterinarian first. They can give you the best advice for your individual dog!

Understanding the Nutrition of Homemade Dog Treats Variety
Okay, so you’re probably wondering about the nitty-gritty nutrition stuff for these homemade dog treats variety, right? It’s a little tricky to give exact numbers because, honestly, it totally depends on the specific brands of peanut butter and applesauce you use, and if you add any extra goodies! So, the calorie counts and percentages you might see are really just general estimations. Think of it as a ballpark figure! For any serious dietary planning or if your dog has specific health needs, your best bet is always to have a quick chat with your vet. They can give you the most accurate advice tailored just for your furry pal!
Print
Delicious Homemade Dog Treats Variety Pronto
- Total Time: 40 minutes
- Yield: Approximately 30-40 treats (depending on size) 1x
- Diet: Vegetarian
Description
A collection of easy homemade dog treat recipes offering a variety of flavors and textures to keep your canine companion happy and healthy.
Ingredients
- 1 cup whole wheat flour
- 1/2 cup rolled oats
- 1/4 cup peanut butter (xylitol-free)
- 1/4 cup unsweetened applesauce
- 1 tablespoon honey
- 1 egg
- Optional: small pieces of dog-safe fruits or vegetables
Instructions
- Preheat your oven to 350°F (175°C). Line a baking sheet with parchment paper.
- In a large bowl, combine the whole wheat flour and rolled oats.
- Add the peanut butter, applesauce, honey, and egg to the dry ingredients.
- Mix until a firm dough forms. If the dough is too dry, add a teaspoon of water at a time. If it’s too sticky, add a little more flour.
- If using, gently mix in small pieces of dog-safe fruits or vegetables.
- Roll out the dough on a lightly floured surface to about 1/4 inch thickness.
- Cut out shapes using cookie cutters.
- Place the treats on the prepared baking sheet.
- Bake for 15-20 minutes, or until golden brown and firm.
- Let the treats cool completely before serving to your dog.
Notes
- Always use xylitol-free peanut butter as xylitol is toxic to dogs.
- Ensure any added fruits or vegetables are safe for canine consumption.
- Store treats in an airtight container in the refrigerator for up to a week.
- For longer storage, freeze the treats.
- Prep Time: 20 minutes
- Cook Time: 20 minutes
- Category: Dog Treats
- Method: Baking
- Cuisine: N/A
Nutrition
- Serving Size: 1 treat
- Calories: Approximately 30-50 calories per treat
- Sugar: Varies based on ingredients
- Sodium: Low
- Fat: Moderate
- Saturated Fat: Low
- Unsaturated Fat: Moderate
- Trans Fat: 0g
- Carbohydrates: Moderate
- Fiber: Moderate
- Protein: Moderate
- Cholesterol: Low
Keywords: homemade dog treats, dog biscuits, healthy dog treats, dog treat recipes, dog snacks, peanut butter dog treats, oat dog treats, apple dog treats, variety dog treats